jungle-gif
  • About Tookan

    • Tookan is a Workforce Management tool used by businesses worldwide to cater to their multiple business needs. With a range of best in class features for complete automated management systems, Tookan has been known and understood as one of the most competitive delivery management tools available today.
    • Who all can use Tookan

      Tookan poses a three-way utility for Mobile Workforce Management Businesses like Pick & Drop Service Providers, healthcare, beauty etc.

    • Tookan is a masterfully managed support system that can be easily used by Administrators, Managers, Merchants and Service Providers for automated dispatch & delivery, real-time tracking, route optimization and integrated tools for building geo-analytics powered reports.
    • Here, we take you through the experience journey with Tookan
  • Step 1: Registration as Service Provider by Business Owner:

    • In a SAAS Business Model (Software as a Service), the administrator can register as a Service Provider You can submit mandatory details with them. Mandatory details include Name, Email ID and Contact Number.
    • Upon submission, you will receive an SMS/E-Mail Notification with the usage link along with the Username and Password to access your account in the agent app.
    • From the redirection link, you can download the Tookan Mobile App available for both Android and iOS and complete the sign-up process.

    Here is what the app would look like. 

  • Registration as Service Provider by Self

  • For white-labelled apps,you can register as a Service Provider yourself and can complete the registration process in 3 quick steps:

    • Download the app from the App Store or Play Store.
    • On the welcome screen, choose the option to Sign Up as a Service Provider.
    • This redirects you to the next screen where you fill in the mandatory details required by the merchants/administrators.

    This is where the sign up process completes. After completion and submission, the admin receives an email notification with your details. Once the admin verifies your details he will activate you from his end. Post that you are live to work on the platform.

  • What All Information Will You Require To Sign Up On Tookan?

    • The sign-up templates showcase fields seeking information as required by the business owners. This is what the screen looks like:
    • The fields marked with an asterix (*) are the mandatory fields, compulsory to be filled in.
    • The compulsory fields include First name, contact number, username, email. Admin can add more fields and make them as mandatory or non-mandatory.
    • This information will become a part of your profile after you are activated on the platform.
    • Admin can either allow you to change this information from the app yourself or they can retain this control. In the latter case, you can reach the admin to update your information.
  • Step 2: Customising The Settings

  • After the sign up process is complete, you have full access to customise the Tookan app to suit your needs. Here’s how to customise settings on the tookan app.

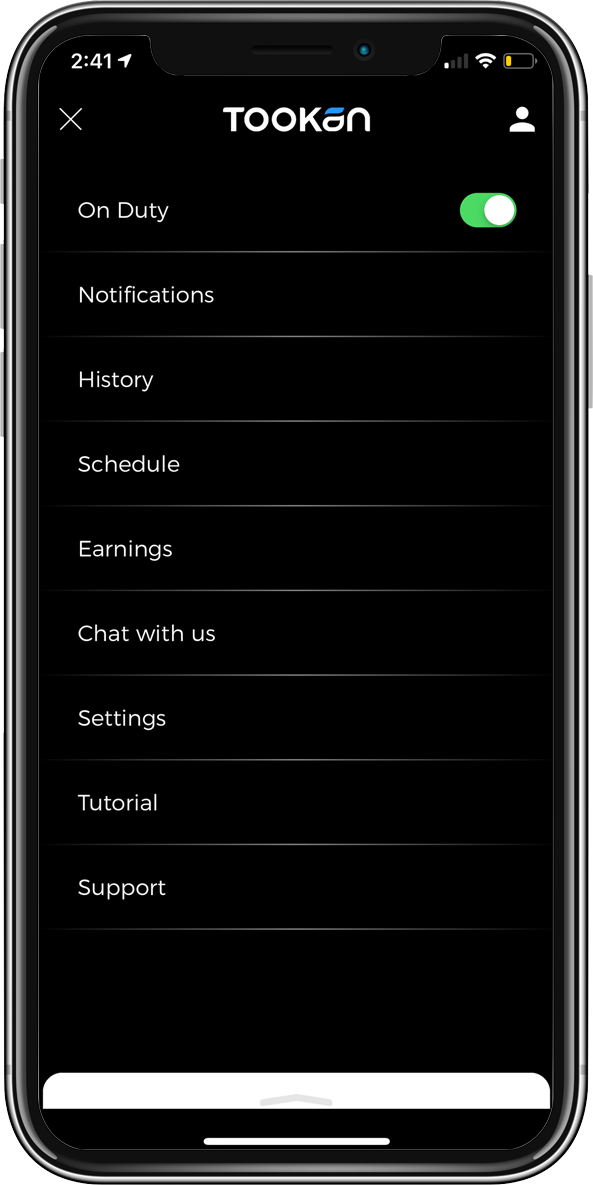
    To the top left of your phone screen, go to the three bar menu.

    On the settings tab, the following sequence appears:

  • Vehicle Settings

  • Choose vehicle type:

    As a service provider, the Tookan app allows you six means to select as your mode of transport. You can select from among:

    • On foot: When you select this option, the choice is automatically confirmed
    • Bicycle: Upon choosing the bicycle mode, the app asks for bicycle color
    • Scooter: Submit Model, License Plate, Color
    • Motorcycle: Submit Model, License Plate Number and Color
    • Car: Submit Model, License Plate Number and Color
    • Truck: Submit Model, License Plate Number and Color
  • Notification Settings

  • > Set Ringtone Type: 

    The Tookan App offers two ringtone options- short and long. 

    • Short Ringtone: The option enables a shorter alert ringtone that rings for two seconds.
    • Long Ringtone: This is a relatively longer ringtone alert that repeat rings until you  accept or decline.

    > Vibration:

    Alongside a ringtone alert, an additional vibration alert notification option, when enabled will enable the phone to vibrate alongside ring when a task assignment alert is received.

  • Advanced Settings

  • Language:

    Tookan is an international field-force management system, available globally in 28 languages so far. You can choose from the available options in language that changes the default language (English) to the chosen language (French in the below case) throughout the app interface. 

    Navigation:

    The Tookan App offers navigation provisions through three third-party mapping API’s: Google Maps, Waze and Apple Map; the most widely used one being Google Maps. 

    Show Traffic: 

    When toggled to the right (bar looks green), the Show Traffic feature is enabled. Using this feature, when you set out for a task, high traffic routes will be duly marked on the route that you are taking. 

     You then have a choice to select the most suitable route. This is especially helpful in cases of urgent deliveries in industrial use cases with the medical industry; so help can reach faster.

    Power Saving Mode

    When enabled, the power saving mode aides to save phone battery; especially valid on long days, long journeys or on the days when there are multiple tasks to be accomplished. 

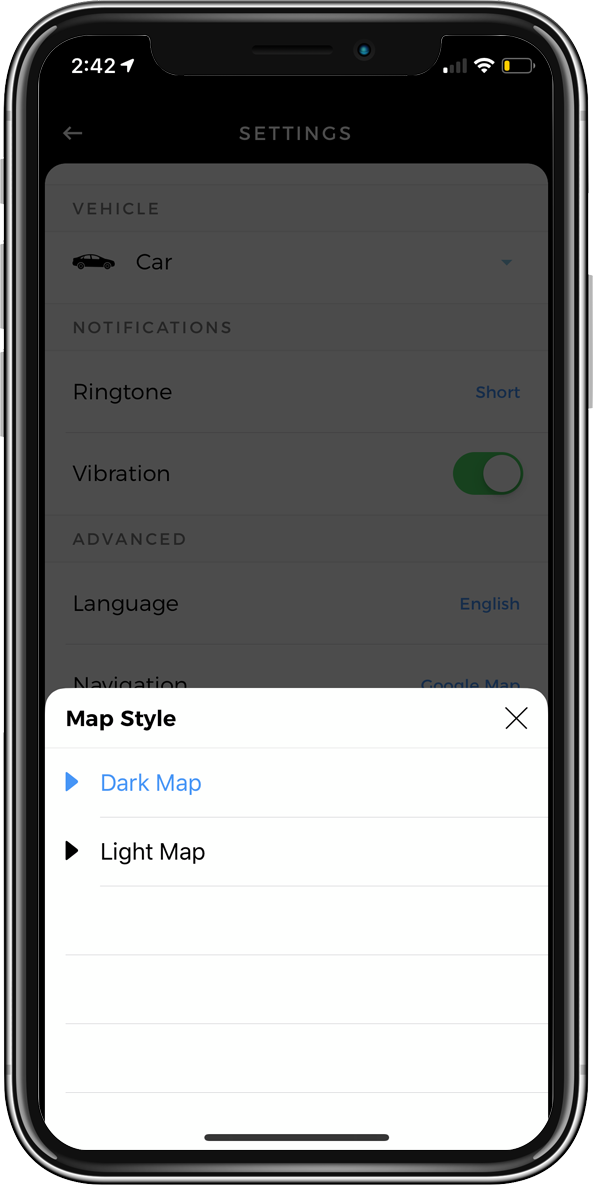
    Map Style 

    You can customise the map view between a dark map and light map as per your visual comfort. 

    Exercise your Rights

    Tookan believes in giving you varied rights for your best benefits. 

    You reserve:

    • The Right to be Forgotten
    • The Right to Portability
    • The Right to Rectification
    • The Right to Restriction of Processing
  • Step 3: Scheduling On-Duty / Off Duty

  • A certain number of times, we get queries from Service Providers on why they have not been able to receive tasks even on the days they are marked  available (You can mark the availability on the calendar) 

    Here’s why. 

    • Click on the 3-bar tab on the top left.
    • If the On-duty tab is toggled right, the admin will know you’re available on-duty
    • If it is toggled left, you will be shown as unavailable to the admin to take up the job

    Ascertain that you are marked “On-duty” for whatever duration you are available to work so the administrators can assign the task to you; further reaping maximum revenues for yourself. 

    If you are marked “Off-duty”, despite marked available for the day, you may not be assigned any tasks to complete.

    This feature works in your favour as well. Let’s say you marked yourself available between 9am-5pm on Monday; but something urgent came up on the personal front and you won’t be available. In such circumstances, you can mark yourself Off-duty.

  • Marked Available Does Not Mean You Are On Duty

    • It needs to be noted: Not all admins allow you the permission to mark your availability and keep the controls reserved to themselves. This is especially true in cases of full time Agents and Service Providers.
  • Step 4: Task Journey

  • 4.1 Accept or Decline a Task

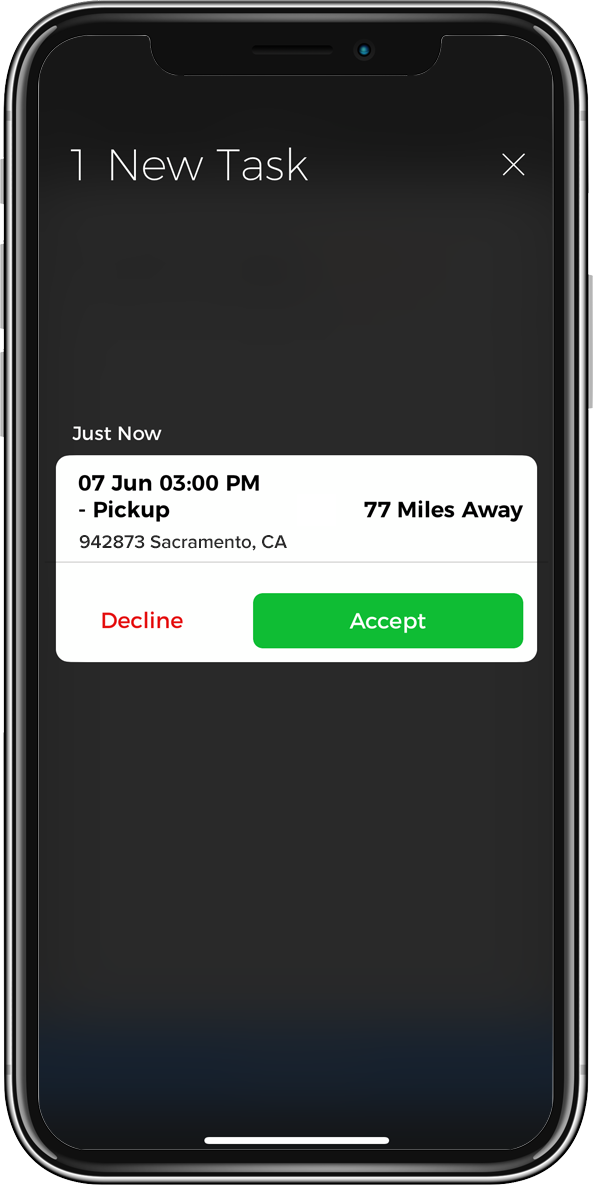
    • Once a new task is listed by the admin on the Tookan App, the admin assigns a task to the available Service Provider on-duty. This may be automated or manual.
    • Once the task is assigned, the Service Provider to whom the task is assigned receives a notification on their phone. (Refer Notification Settings)
    • If you receive the task notification, upon opening the app, you can select either the Accept or Decline option, based on whether or not you wish to take up the job.

    *It must be noted that not all admins enable this feature. So you may or may not be able to Accept or Decline a task.

    4.2 Task Completion

    • You receive a task on the app which you accept or decline.
    • If the task is declined, the app switches to a normal view
    • If the task is accepted, you swipe towards “start the task”
    • The task details will now be made available to you, including the name of the concerned person, address, contact information and destination location.
    • Once the task begins, you proceed to the task location, for example, a delivery task. You can navigate through the enabled choice of maps(Read Navigation) and follow the directions to reach the delivery location.
    • Upon reaching the delivery location, collect the proof of delivery- this includes a digital signature that gets automatically saved on the device. This feature, as well, is enabled only by certain administrators.
    • Post completing the due formalities swipe right towards “Complete the task”


    The task is now complete. 


    4.3 What if the receiver is unavailable?


    At times, it might so happen that the receiver is unavailable at the delivery address. In this scenario, the task still remains “Incomplete.” 

    If however, you decline the task, it will be marked as “Cancelled.”


    4.4 Reminders

    When you acknowledge/accept a task, but haven’t yet started the job, a pop-up alert appears when you are left with 30 minutes to complete a task.

  • Step 5: Earnings and task history

  • 5.1 About Earnings:

    For you to see your earnings on the mobile app, the Admin needs to enable the Pricing and Earning extension.You can see your earnings after the task completes. In the earnings tab, you can also see your weekly and monthly earnings. 

    To see day wise earnings: Select the date on the calendar and see your task and earnings for that day. 

    5.2 Viewing Task History

    • Go to Menu in agent app > History > Select a task
      Task history shows you the timeline of when you-

      •  – Accepted a task
      •  – Started a task
      •  – Arrived at destination, and
      •  – Successfully completed a task
    • When you click successful/failed, you’ll be able to view the task history just below the action block.

    Alternatively, you can also tap on the calendar and select a particular date. All the tasks for the selected date will appear as a scrollable list. Tap on the task to view the details corresponding with it.

    Viewing Options: List, Calendar and Map View 

    • List View : All the current day’s tasks appear as a scrollable list at the app homepage. You can scroll to view the tasks and click on the task to know the details corresponding to that particular task.
    • Calendar View : The Calendar View allows you to view both past tasks and those aligned for the coming days. In the view, you can see either or both red and blue dots on top of a date.The Red dot indicates incomplete tasks and the Blue Dot indicates the tasks assigned for that date.
    • Map View : In the map view, all the current days task appear in a scrollable view at the bottom- particularly beneficial when you want to see the task location when you view a task. Scroll left and right to view the tasks and their corresponding locations on the map. To view the task details, click on the task title.
  • What If The Receiver Is Unavailable?

  • At times, it might so happen that the receiver is unavailable at the delivery address. In this scenario, the task still remains “Incomplete.” 

    If however you decline the task, it will be marked as “Cancelled.”

  • About Earnings

  • For you to see your earnings on the mobile app, the Admin needs to enable the Pricing and Earning extension.

    You can see your earnings after the task completes. In the earnings tab, you can also see your weekly and monthly earnings. 

    To see day-wise earnings: Select the date on the calendar and see your task and earnings for that day.

  • Viewing Task History

    • Go to Menu in agent app > History > Select a task

      Task history shows you the timeline of when you-

      •  Accepted a task
      •  Started a task
      •  Arrived at destination, and
      •  Successfully completed a task
    • When you click successful/failed, you’ll be able to view the task history just below the action block.

    Alternatively, you can also tap on the calendar and select a particular date. All the tasks for the selected date will appear as a scrollable list. Tap on the task to view the details corresponding with it.


    Viewing Options: List, Calendar and Map View 

    • List View All the current day’s tasks appear as a scrollable list at the app homepage. You can scroll to view the tasks and click on the task to know the details corresponding to that particular task.
    • Calendar View The Calendar View allows you to view both past tasks and those aligned for the coming days. In the view, you can see either or both red and blue dots on top of a date.The Red dot indicates incomplete tasks and the Blue Dot indicates the tasks assigned for that date.
    • Map View In the map view, all the current days task appear in a scrollable view at the bottom- particularly beneficial when you want to see the task location when you view a task. Scroll left and right to view the tasks and their corresponding locations on the map. To view the task details, click on the task title.
  • Reminders

  • When you acknowledge/accept a task, but haven’t yet started the job, a pop-up alert appears when you are left with 30 minutes to complete a task.

Serving clients all over the world

Customers in over 180 countries are growing their businesses with Jungleworks.
5K+Live businesses
180+Countries
5M+Users

Ensure on-time deliveries with real-time route optimization and end-to-end delivery tracking