
Merchant billing on Tookan
Once you have onboarded merchants through our merchant extension you can also automate billing and charge your merchants through Tookan. You can create custom subscription plans for your merchants and charge them accordingly.
Here’s a step-by-step guide to configuring merchant billing.
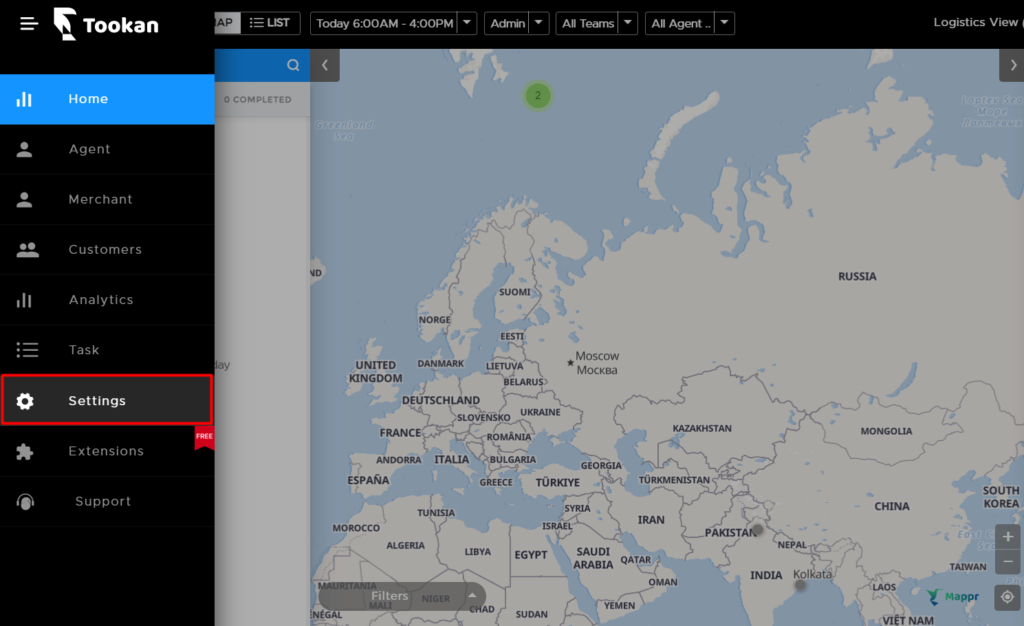
Step 1: Go to Side Menu > Settings
Step 2: Go to Merchant Billing
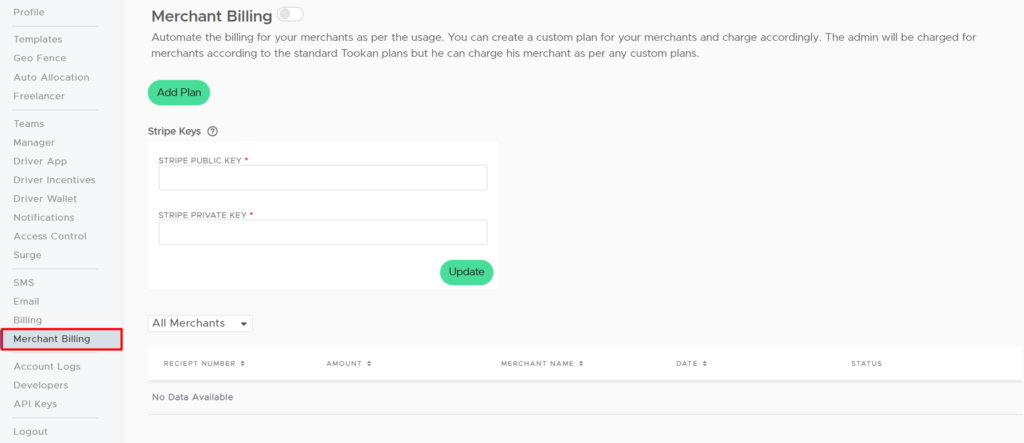
Step 3: Enable the Merchant billing toggle to activate merchant billing and Click on “Add plan”
You can create various plans for your merchants:
- Task Based
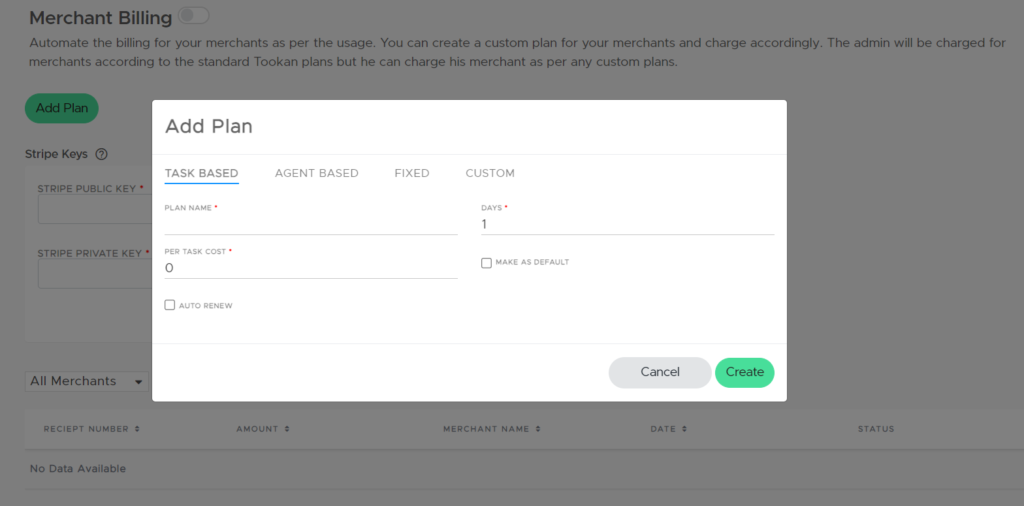
Here’s what each field means:
- Plan Name– Name of the billing plan
- Days– The number of days billing should run for
- Per Task Cost– Rate of each task created by merchants
- Make as Default– This option will make this plan default plan for all the merchants onboarded
- Auto Renew– This option will renew the plan automatically after the billing cycle ends
2. Agent Based
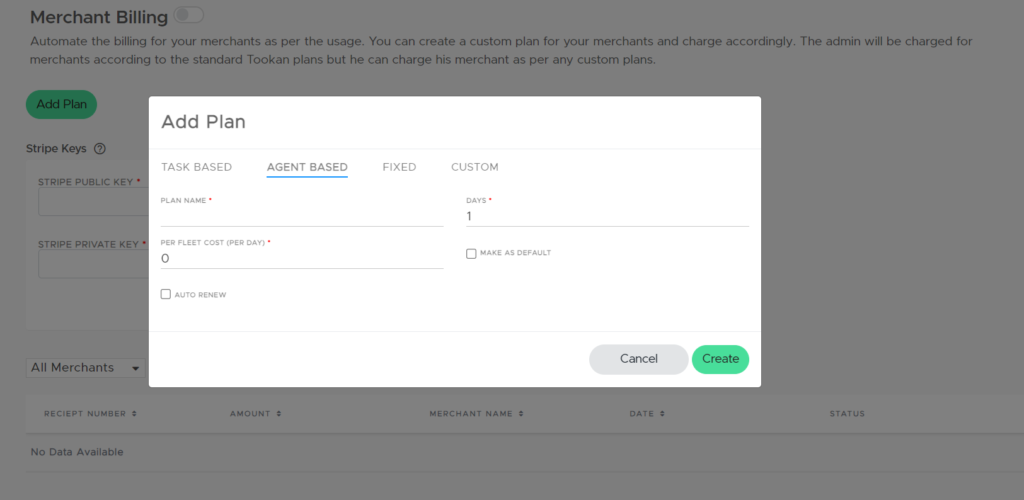
Here’s what each field means:
- Plan Name– Name of the billing plan
- Days– The number of days billing should run for
- Per fleet Cost (per day)- Rate of each agent added by merchants on per day basis
- Make as Default– This option will make this plan default plan for all the merchants onboarded
- Auto Renew– This option will renew the plan automatically after the billing cycle ends
3. Fixed Plan:
In the fixed plan, number of tasks and fleets is to be constant for the merchants. The amount of plan stays fixed.
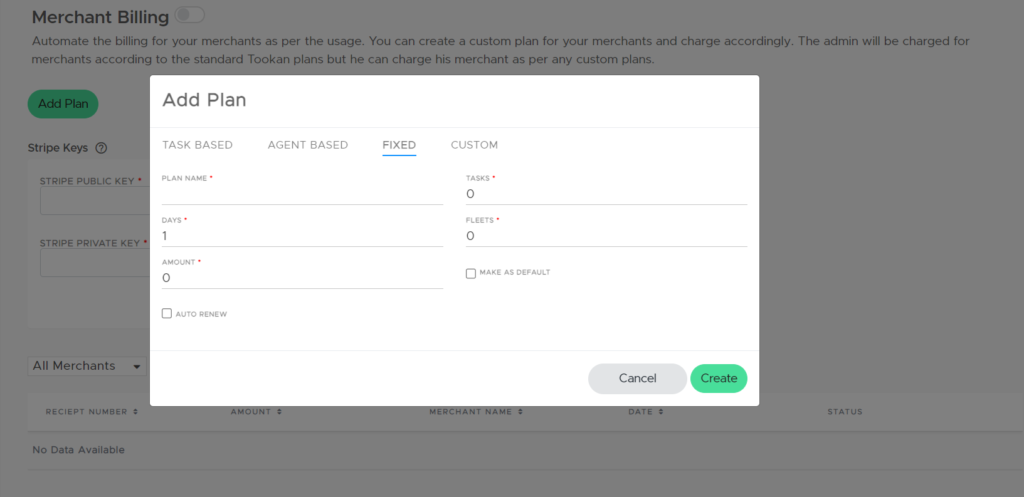
Here’s what each field means:
- Plan Name– Name of the billing plan
- Tasks– Number of fixed tasks that a merchant can create
- Days– The number of days billing should run for
- Fleet– The number of fixed agents that a merchant can add
- Amount– The fixed amount of the plan payable by the merchant
- Make as Default– This option will make this plan default plan for all the merchants onboarded
- Auto Renew– This option will renew the plan automatically after the billing cycle ends
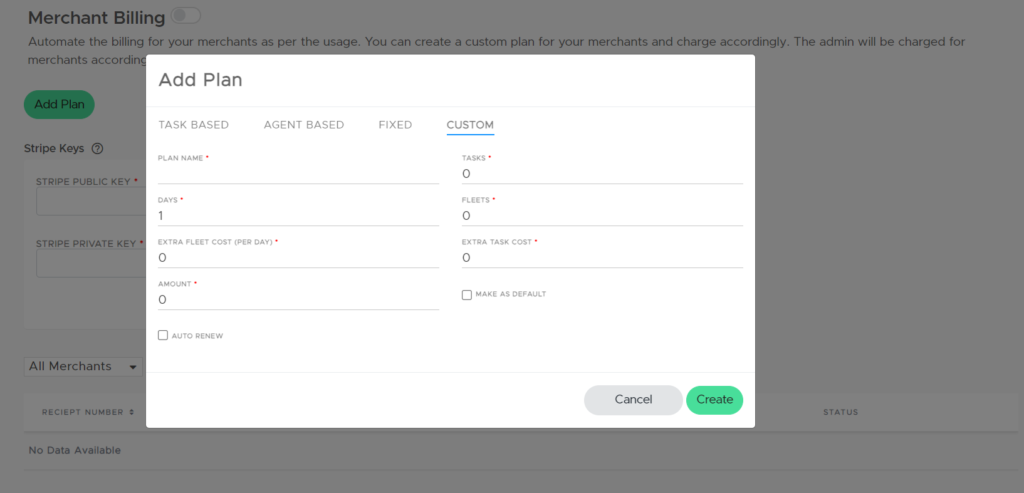
4. Custom Plan
A custom plan is similar to a fixed plan. On top of that, you can also set the pricing for extra tasks created & extra agents added by merchants in this plan.
Step 4: Configure your Stripe account keys to start billing and receiving payments from merchants through Tookan. For this, you would need Stripe Public Key and Private Key from your Stripe account dashboard.

Note: To support Stripe SCA in your account, kindly follow these steps:
- Add https://api.tookanapp.com/stripe_webhook as a webhook under Developer>Webhooks in your Stripe account.
- Add webhook for payment_intent.succeeded and payment_intent.payment_failed events.
To know more about Merchant Billing on Tookan, kindly watch this video.
Leave A Comment?